![]()

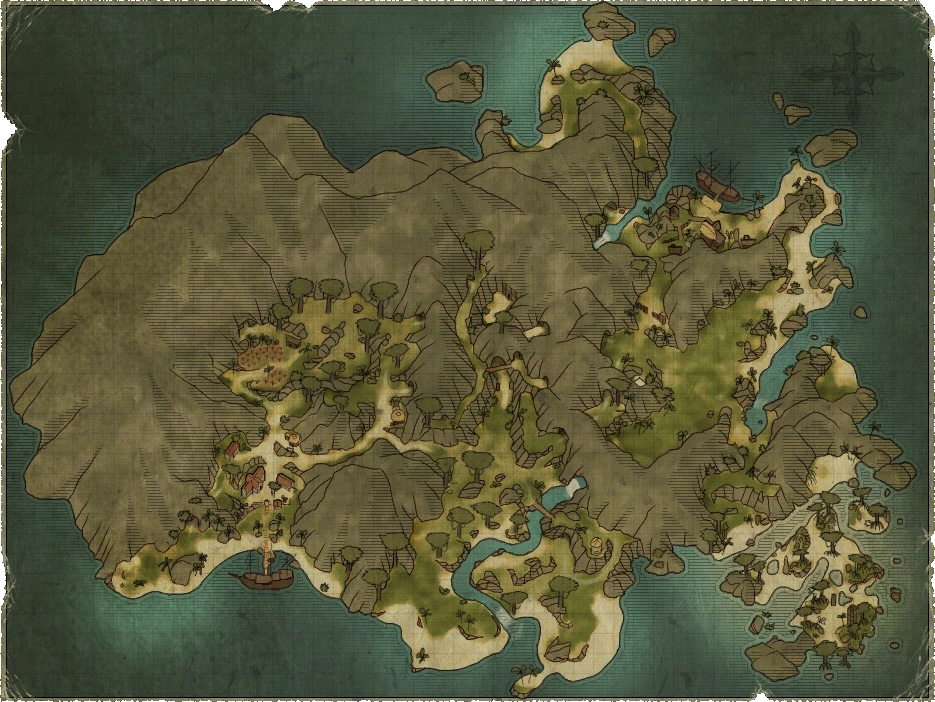
Puerto Sacarico
- Sugar Island. Apart from a sugar plantation owned by the Inquisition, there is also a small pirates' den in the east of the island.
Description taken directly from Risen 2 official site.[1]
- Tacarigua is an island in the Southern Seas covered by a thick jungle. Here, the Inquisition has laid sugar cane plantations which are being cultivated by slaves. There is strong demand for sugar in Antigua, particularly for the rum which is extracted from harvested sugar cane. The rum is also legendary throughout the Southern Seas.
- Puerto Sacarico is the main base on the island, and here a handful of Inquisition soldiers guard the slave labourers. The situation in general on the island is tense as people continue to disappear without a trace. These inexplicable losses make the Inquisition’s henchmen nervous as production cannot be adequately maintained. To make matters worse, pirates now seem to have built dens on the island.
- There are indeed indications that a freebooter’s den is located somewhere on the island. However the lonely island also has darker and more dangerous spots, that cause even the bravest of adventurers to tremble.
Locations[]
- Large Gate
- Jack's Lighthouse
- Pirates' Den
- Puerto Sacarico
- Vasco's Tower
Quests[]
10 Bloody Roots[]
Elia, the distillery assistant at Booze's tavern, will sell you the Bloody Mary recipe for ten Bloodroots. You can harvest the plant yourself, you can find many scattered around the island, or you can trade Colby three bottles of rum for nine plants. You can find colby near the waterfall by the Pirate's Den or at the camp's Large Gate.
7 Sacks of Sugar[]
You can find all seven sacks of sugar just inside a cave near Jack's lighthouse. You can follow the termites to find the cave's location. However, you will have to fight off the termites to get inside.
Become a Pirate[]
In order to satisfy Steelbeard and earn your rank amongst the pirates, you much accomplish as least five of the following quests:
- Freeing Largon
- Crab Slapping with Blake
- Pete's Treasure Map
- Old Grave plundered
- Night-time Pursuit and The Traitor and the Beast
- The Water Carriers and The Sugar Shipment
- Settling the Score with Hank
- O'Brian's Treasure Map
Bounty[]
This is an optional quest given only if you speak to the governor about runaway slaves and agree to pursue them for a bounty. You can find the slaves in the jungle east of Vasco's tower. These enemies are particularly difficult, so bring Patty with you. Collect their belongings and return to the governor for your reward.
The Clothes of a Pirate[]
In either Caldera or Puerto Sacarico, speak to the imprisoned Largo. He will ask that you return his bandana, worn-out shoes, his leather shirt, and his black pearl earring. To retrieve the pearl, learn pickpocketing from Largo, then speak to Carter who sits next to Largo's cell and offer him some grog. While he is tipsy, you can select the pickpocket option from the dialogue tree and take back the pearl. Sneak into the Puerto Sacarico barracks and snatch the shoes in the back of the cabin - you can even run in during the day. Retrieve the bandana from Riley located in the sugar plantation just north of Puerto Sacarico by either fighting him or intimidating him. Lastly, purchase Largo's pants from Carter directly for 150 gold.
Crab Slapping with Blake[]
Help Blake kill giant crabs. Five come from the sea near Blake simultaneously. Kicking them before attacking is the best method of dispatching them quickly. However, Blake will kill them by himself eventually if you can manage to avoid the crabs' attacks. Your reward is distributed based on whether or not you killed more crabs than Blake. You will get 50 gold if you kill 2 or less crabs and 100 gold for killing 3 or more.
A Difficult Chest[]
There is a chest of gold in the pirate ship docked at the pirate camp. You will need a lock pick and the lock picking ability. The former you can purchase from the blacksmith for 500 gold (or get for free while doing Largo quest) and the latter you can learn from Largo for 1000 gold. To learn lock picking, you will need a Cunning of at least 4. You may want to complete this quest after leveling quite a bit.
Distract Alister[]
You can distract Alister from his guard duty by sending the prostitute Lola upstairs. You can find her on the second floor. She requests 100 or 200 gold for her services. Sneak upstairs while Lola and Alister are busy and Elia is asleep to rummage around Booze's room freely.
A Fat Roast[]
Thompkins will ask you to hunt down the nearby Prize Warthog. The warthog is just up the hill from Thompkins and is easy to kill, with or without his help.
Fight Doggs[]
This quest is triggered during The Watter Carriers quest if you choose Colby to man the front gate of the Pirate's Den. Defeating him should be relatively easy.
Fight Fosters[]
This quest is triggered during The Watter Carriers quest if you choose Colby to man the front gate of the Pirate's Den. Defeating him should be relatively easy.
Find Steelbeard[]
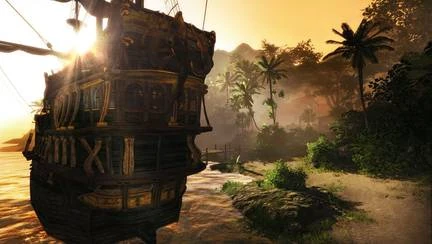
Steelbeard is onboard the ship at the Pirate's Den on the North-East portion of the island. If the front gate is not open, circle around the mountain running along the East side of the gate. You will find Blake and an opening to the Pirate's Den near the beach.
Find the Pirate's Den[]
The Pirate's Den is on the North-East portion of the island. If the front gate is not open, circle around the mountain running along the East side of the gate. You will find Blake and an opening to the Pirate's Den near the beach.
Follow Largo[]
Speak to Largo after freeing him from jail and he will tell you that he plans to head to the pirate den. If you choose to tag along, this quest becomes active. Simply lead him through the jungle to accomplish the task. Largo cannot die, so do not worry about protecting him during battles.
NOTE: MAJOR BUG: If you do this quest after getting another lockpick from Jim in chapter 2, Largo will take it if you do the "follow" quest, and largo will never give the lockpick you have back. DO THIS QUEST ONLY IN CHAPTER 1 to avoid this bug.
Freeing Largo[]
This quest can be lost immediately if you tell Largo while in captivity that you refuse to help him escape captivity or that he should mind his own business. You can free Largo by acquiring a lockpick. After completing acquiring the Bandanna or the Black Pearl from The Clothes of a Pirate quest, speak to the blacksmith in the pirate camp. He will give you a lockpick which you can use to free Largo. You can either purchase it from him for 500 gold or convince him to give it to you for free.
NOTE: MAJOR BUG: If you do this quest after getting another lockpick from Jim in chapter 2, Largo will take it if you do the "follow" quest, and largo will never give the lockpick you have back. DO THIS QUEST ONLY IN CHAPTER 1 to avoid this bug.
Grog for the Guards[]
If you successfully convince Patty to work in Osorio's kitchen, Osorio will give you five bottles of grog to deliver to Gilles. Head to the sugar plantation just north of Puerto Sacarigo. Give the gorg to Gilles and he will ask you to carry a message to Thomkins, starting the Let Thompkins Know! quest.
A Hungry Slave[]
Visit the sugar plantation just north of Puerto Sacarico during the day and the slave Asad will tell you of his hunger. Simply offer some Provisions to Asad to complete the quest.
Kitchen Help[]
Osorio in the kitchen of Puerto Sacarico wants help in the kitchen. Only Patty can help, but she refuses. To pursuade her, you must have at least 10 points on Silver Tongue. Select the plan option and she will work for Osorio for the day. This quest opens the Grog for the Guards quest.
Largo's Clothes[]
Receive this quest from Largo by talking to him after you find four of his things in the Clothes of a Pirate quest. Return to Largo for your reward after you have received all of his clothes. You can find descriptions for the items in the Clothes of a Pirate quest desctiption.
Let Thompkins Know![]
Tell Thompkins about the grog delivery from the Grog for the Guards quest. He can be found to the right of Gilles' shack near the sugar plantation, just up the hill.
A Map of Tacarigua[]
While not necessary, completing this quest to attain a map of Tacarigua is incredibly useful. Tell Pedro located in the town's square that you are looking to travel to the other side of the island. Mention a map during the conversation and he will tell you Di Fuego can sell you one. Put on some clothes and head into the building to talk to Di Fuego. You can purchase the map for 100 gold or, if you still have a letter to the pirates, hand it to him and convince him to give it to you for free so you can find your way.
Meat for the Cook[]
After speaking with Thompkins, he will give you a piece of meat to deliver to Osorio. You can find Osorio back in the kitchen in Puerto Sacarico.
Night-time Pursuit[]
After speaking to Meeks, a surly pirate in the back of Booze's Tavern, Booze will with ask you to follow Meeks and learn his secret. Wait until night and tell Booze you are ready to follow Meeks. Stay just out of site and follow him to the beach, where a Sunken One walks out of the ocean. This triggers the Traier and the Beast quest.
O'Brian's Treasure[]
After completing the O'Brian's Treasure Map quest, you will have the map and the location of the treasure will be marked with an X on your map. You will need a shovel, which you can buy from Flannigan in the pirate camp. Head up to the waterfall near the camp and move north through the tunnel ahead. You will find the treasure marked by a red X on the beach.
O'Brian's Treasure Map[]
O'Brian is a loud bearded drunk you can find in Booze's tavern. He will tell you he buried a treasure and is willing to part with the map if you beat him in a drinking contest. You will need either a Monkey (difficult to free on your first visit to Tacarigua), Largo's Black Pearl from the Clothes of a Pirate quest, or 500 gold to risk on the contest. You will also need a bottle of Painkiller which you can purchase from Booze. Practice the drinking game and save before attempting the contest - if O'Brian wins, the deal is over and you will not be able to complete this quest.
Old Ruin Plundered[]
This task requires you discover any one of four idols hidden in one of the tombs scattered throughout the island. You can find their entrances near ruins jutting from the jungle. These tombs are heavily guarded by very difficult creatures - prepare accordingly! The first idol can be found right outside the gate to the pirate encampment. After gaining access inside, use one of the cannons on the wall to shoot at the mayan looking door to bust it open. Inside there will be a couple of hard to kill enemies, so make sure Patty is accompanying you. You can find another idol in a cave just north of Vasco's tower guarded by a Grave Spider. The other two are located in tomb located in the gorge where you find Pete's corprse for the Pete's Treasure page. The West corridor is guarded by a trap. The East corridor is guarded by a very dangerous Ghoul. There's a monkey hole in the northern cave above the sugar plantation totally full of sweet plunder. There is no walkthrough for sword coast so i'll add more monkey hole locations. In the temple north of where you start on the sword coast in the ruin there's two. Another in the temple right behind the natives camp on the sword coast. On antigua use the monkey on the second story of the storehouse to go up the roof and into a hole in the roof to find goodies. Also jump your monkey into the gunsmith frenchman's window to get Wilson's pistol for free on Antigua. I'll add more monkey info as I find it.
Pete's Treasure[]
After completing Pete's Treasure Map, the location of Pete's treasure will be marked on the map.Head just north of Pete's body. The treasure is marked by a red X, next to the shovel stuck in the ground.
Pete's Treasure Map[]
Talk to Holly in Booze's tavern to hear rumors about Pete and his treasure. She tells you Pete went to bury his treasure in a gorge near an ancient ruin. You can find the location by heading out of the pirate camp and heading west. Head strait and you will see a gorge to your right leading under some arches. You will find Pete's corpse near the building entrance, just a short bit away from Pete's Treasure.
Pirate Post[]
After first entering Puerto Sacarico, talk to Roquefort, a soldier you just watched talk to Sebastiano. Tell the man you intend to join the pirates and he will ask you to deliver a letter to the den. You can find the pirate camp in the North-East corner of the island. Speak to Booze in Booze's tavern to complete this quest.
Provisions[]
This is a simple quest asking you to locate a food source. Simply talk to Osorio in Puerto Sacarico and ask him if he sells food.
The Rum's Got to Come[]
Retrieve this quest from Steelbeard or Booze after completing The Water Carriers and The Sugar Shipment. Speak to Booze after the two aforementioned quests to complete The Rum's Got to Come.
Settling the Score[]
After speaking with holly, Hank will confront you and ask you to pay for the time spend with her. If you refuse, this quest becomes active and Hank will attack. The quest is completed whether or not you pay off, defeat, or lose against Hank.
Sturdy Clothes[]
Pedro in Puerto Sacarico tells you to find some clothes. Simply talk to Carter who sits just up the hill next to the jail cell holding Largo.
The Sugar Shipment[]
Speak to Jack who lives in a lighthouse in the southern part of the island. He will tell you Termites stole the sugar. You can find them west of the tower, carrying sugar into a nearby cave. Defeat all the Termies for The Termite Plague quest and collect the sacks of sugar, automatically completing 7 Sacks of Sugar.
The Sugar Trade[]
After delivering Roquefort's letter, Booze will ask you to return his answer to Di Fuego in Puerto Sacarico. Di Fuego expects compensation, which you can either pay yourself or collect from Pedro in the Puerto Sacarico square.
The Termite Plague[]
Jack wants to to kill all the termites that stole the seven sacks of sugar. You can find them to the west of his lighthouse, both in and outside the cave.
The Traitor and the Beast[]
This quest activates immediately upon completing Night-time Pursuit. Simply dispatch Meeks and the Sunken One to complete the quest.
The Water Carriers[]
Booze asks then you get water running again to supply his distillery. You may speak with Curtis outside of Booze's tavern and he will blame the lack of water on the lazy water carriers. Head west to the waterfall to find three water carriers, two of which are bickering. It is up to you decide which person changes shifts to watch the gate. If you select Doggs or Foster, the quest is completely immediately. If you select Colby, you must fight both other pirates to complete the quest.
Walkthrough[]
Part 1[]

Part 2[]

Part 3[]

Map[]
.png "Map of Tacarigua (with names).png (938 KB)")
")
References[]
- ↑ http://www.risen2.com/world/tacarigua/, Risen 2 official site, 3/23/2012.